7 Essential Handgun Shooting Tips

Our handgun training journeys can start under many different circumstances. But one factor is universal, we all want to get better and improve our shooting accuracy. The progress we make can be attributed to a great instructor, our own YouTube research, or even just trying out new things. If you are trying to become more accurate, our tips can help you find the right track.
Tip #1 Trigger Control
Your trigger is how you control when the shot fires. So it is crucial to learn how to pull the trigger effectively so you can learn how to shoot a pistol accurately. Dry fire practice opens your eyes to the movement you didn’t know was happening through your trigger press. Your goal is to keep the firearm on target throughout the entire trigger press. Focus on eliminating extra movement as you are pulling the trigger.
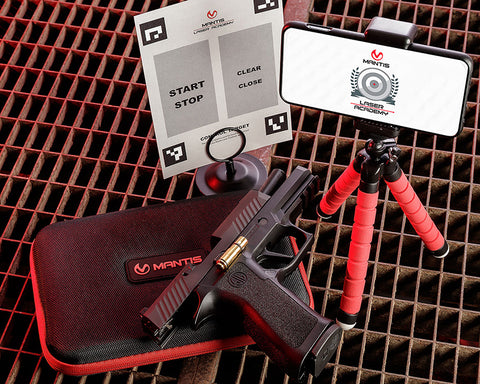
If you use the Laser Academy Kit to train, you can visualize your shots on a target. The kit comes with a caliber-specific laser cartridge that fits in your firearm. You can set up the bullseye target and track your shot group consistency. Get your reps in by setting shot goals daily, weekly, or even monthly. Trigger control can be a perishable skill, so make sure to keep your training consistent!

If you use the Mantis X10 to train, you can see the movement through the trigger press. The smart sensor will break down your trigger press into three different colors. Blue is the hold movement, yellow identifies the trigger press, and red is your post-shot movement. Each shot will provide you with positive reinforcement in the Mantis app and a score to help you grade progress.
Dry firing your handgun also gives you more time on the gun. Incorporating dry fire into your training gives you the ability to practice with the right tools without spending more money at the range and on ammo. You will be able to feel the progress you make from session to session when you start training your trigger control.
Tip #2 Sight Alignment
Trigger control can be perfect, but if you don’t have your sights aligned properly, you will have a hard time hitting where you want to! There are two main types of sights people use on their handguns, irons and red dots. It is important to understand how to use the type on your firearm. Be sure to try both as well so you can shoot with the sight you are most comfortable with.
If you have iron sights, you typically have two pegs in the back and one in the front. An easy phrase to remember for irons is equal height, equal light. Keep your focus on the front sight as you are shooting. The rear pegs should be slightly blurry. Make sure the front sight is lined up in the center of the two rear sights and level.
If you are shooting a red dot, make sure you have your dot over the target, or where you would like to hit. Red dots can seem easier and faster to shoot because you are only focusing on one point.
Tip #3 Understand your eye and hand dominance.
Knowing your eye dominance can be overlooked when you first start shooting. But it can have a large impact on how you choose to learn how to shoot. If you are dominant on the same side for both the eye and your hand, this is ideal. Because you will be able to line up more easily in your shooting. However, let's say you are left-eye dominant and right-handed. Now when you are looking at your shooting stance, you might cock your head over and to the right so that you can line up your sight picture correctly. If you would like to still use your dominant arm, you can push the gun across your centerline more to match your cross dominance. You may want to consider shooting with the same hand as your dominant eye.
How to find your dominant eye:
- Hold both hands out in front of you.
- Create a small triangle by overlapping your left hand over your right hand. This should give you a small area to look through. (Try to have the area be no bigger than the size of your eye.)
- Pick an object to look at in the distance. This could be anything but you can pick a light switch or a target at the range.
- Keep both eyes open and look at the object through the small gap you made in step 2.
- Still keeping both eyes open, bring your hands back towards your face while looking at the object through the gap.
- You should now be looking at the object with one eye. The eye your hands pulled back to is your dominant eye.
Tip #4 Experiment with your Grip
Controlling the firearm by properly holding the handgun is key to success. As you are shooting live fire, you will feel the recoil of the handgun. The recoil of the gun can slow your time to your second shot if you do not have a solid grip on the gun. You can experiment with the two thumbs forward grip.
The amount of pressure you put into the grip of your firearm can change your accuracy as well. If you hold it too tight, you may be able to feel the muscles in your hand trembling with the exertion of force. Try backing out the pressure until it is firm, but you do not feel your hands straining and shaking.
If you have the X2, X3, or X10 MantisX models, you can go to the live trace screen on the Open Training Drill and see the movement of the firearm as you are trying to keep the gun steady. Going to this screen can be an eye-opener if you want to know how much you are moving with your gun in hand. Ethan Webster uses the Mantis X10 Open Training drill to help him work through his grip and accuracy the same way you can at home! He is known for completing over 500 days of daily dryfire to improve his handgun shooting.
Tip #5 Stance
Your stance builds the foundation of your shooting platform. If you are unstable in your position, the rest of your form will suffer. The most common mistake is leaning backward. The recoil will push you backward so if you are not focused on counteracting that force, you will find yourself being pushed into that unstable position.
There are three main stances people use for handgun shooting. The Isosceles, Weaver, and the Modified Weaver. If you would like to run through each stance in depth check out the Pew Pew Tactical Shooting Stance article.
Tip #6 Set Your Own Training Goals
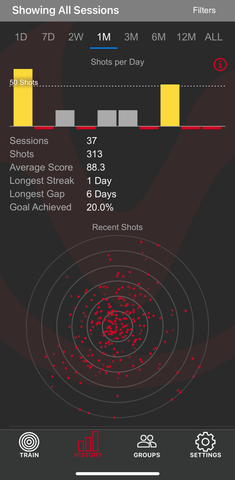
Getting better at shooting a firearm may not happen overnight for you. It is important to set training goals and time aside to go to the range. Shooting is a skill that is perishable so you need to take the time to practice regularly. Like going to the gym, you can set the amount of reps you need to complete in a day, week, or month. If you use the Mantis Laser Academy or Mantis X10, the apps will help you track your progress.
Tip #7 Train with a Friend
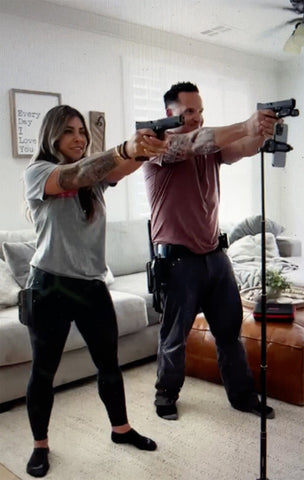
Having a friend or family member train with you can keep you accountable and competitive. With the Mantis Laser Academy and the X10, you can involve other people in your training journey and compete with them in the in-app groups. The groups allow you to train together even if you are not in person with them!
Wrapping Up
Really take your time and learn what processes and techniques work for you. Each tip gives you a great place to start. Dry firing gives you time on your firearm you may not get on the range and setting your own training goals gives you a training journey to pursue!
Frequently Asked Question- Mantis


Rebecca Donnelly
Author