Fundamentals of an Ideal Handgun Shooting Stance
Let's look at how you can use your stance to improve your handgun shooting. Two stances are widely known in the shooting world. We have the Isosceles and the Weaver shooting stance. Then if you want to get fancy, you can modify these handgun shooting stances to fit your needs and goals. However, if you don’t know where to start, isosceles and weaver are great stance techniques to start your journey.
Building Your Stance: Foot Placement
Your pistol shooting stance will start from the bottom and build itself up. You will find that your level of stability depends on foot placement. In both stances, you will want your feet to be about shoulder-width apart with your knees slightly bent. As you are training, focus on making sure you are consistent with your foot placement. It is easy to get distracted and let your shooting stance become inconsistent. 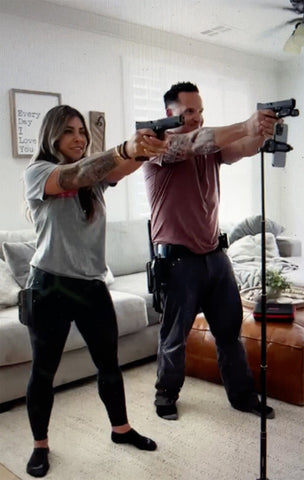
Isosceles: Both feet will be in line and you will be head-on or squared with the target.
Weaver: Your dominant side foot will be placed slightly back. This will angle you slightly. In this stance, you will not be lined up directly with the target.
Building Your Stance: Upper Body
Both stances are made for a two-handed grip. As you are setting up your shooting stance, you will want to keep in mind that both hands will be holding the handgun. If you want to work on how to improve your grip, check out the previous blog: Holding a Handgun for Maximum Accuracy
Your upper body will lean towards the target. The lean forward helps you counteract the recoil of the handgun. How much you lean forward will change depending on your body composition. The larger you are, the more control you may have without leaning as far forward. Our goal is to be as stable as possible so that the recoil of the shot does not interfere with the timing or accuracy of your follow-up shots.
Isosceles: Both arms will be straight and locked out. When you combine your foot placement and your arms, you will find that your body creates an isosceles triangle from the bird's eye view. Hence the name!
Weaver: Your foot placement will cause your support arm to be closer to the target than your dominant arm. Your shoulder on your non-dominant side should be slightly farther forward compared to your dominant shoulder. Both elbows will be bent in this position. Your grip in this position relies on you pushing with your dominant hand and pulling with your non-dominant hand. The push and the pull can give you an advantage in your overall stability in this shooting stance.
Advantages of the Isosceles
The Isosceles shooting stance is more simple to learn than some of the other stances out there. It is also one of the more natural shooting positions people gravitate to. With your feet shoulder-width apart, you can move backward, forward, or side to side as needed. With the simplicity of this position, it can be easier to focus on your sight alignment and trigger control.
Disadvantages of the Isosceles
Isosceles can feel stable during your dry fire training. However, when you add in the recoil of the firearm, some shooters find themselves being pushed backward from the force. If you have a friend or family member around you can do this quick test to see if you are leaned forward enough to counteract the force.
- Get into your isosceles stance.
- Hold your hands out in front of you as if you are gripping a firearm. Do not have a firearm in your hand for this test.
- Have your friend stand in front of you. They will have their hand open as if to give you a high five.
- They will take their hand and push their hand into your two-handed grip. Forcefully.
- Readjust the bend in your knees, back, and shoulders depending on how you feel you can minimize your movement from the force.
- Try again and see how much your control changes.
- Repeat this process until you find the position that works best for you.
Advantages of the Weaver
The recoil management is more effective in this position. The push/ method can help with the grip stability with the rest of your stance position. The Weaver position also gives you more stability from front to back.
Disadvantages of the Weaver
The biggest pain point this position comes with is the ability to keep it consistent when you are in a stressful situation. Weaver requires focus on foot placement, shoulder position, and force from the dominant and non-dominant hands. The complexity of the stance hinders its functionality if you have not put in the time and training.
Testing Which Position is Best for You
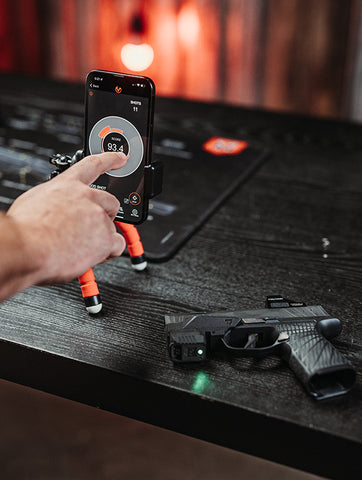
Sometimes finding what works best for you isn't as straightforward as it looks. With the MantisX Smart Sensors, you can test each position and get quantitative results.
- Mount your X10/X3/X2 to your handgun.
- Connect your device to the app.
- Scroll through the drills to the MantisX Benchmark drill.
- Make sure all of your settings are correct. (Dry Fire vs Live Fire, Right vs Left Hand)
- Press the Green Start button.
- Take ten shots in the Isosceles stance.
- Restart the drill and take ten shots in the Weaver stance.
- Compare your scores and timing from each of the Benchmark sessions.
By completing these drills, you will have solid data to compare. Your performance with one stance over another can help you determine which stance you should gravitate towards. It will also help you direct your training to areas you need to improve. Things you can compare between the two sessions:

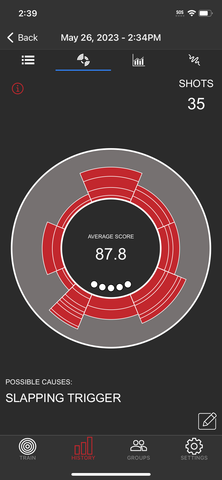
- Scores- The MantisX Smart Sensors will give you a score between 0-100 for every shot.
- Trace Movement- On the trace screen you will be able to see how much movement you had during the trigger press. Are your traces more condensed in one position vs the other?
 Split Times- Are you faster on the recovery of the shot in one position vs the other?
 - Errors- Do you have more errors or inconsistencies with where you pull your shot during the trigger press? For example: Do you always pull low left in Isosceles but in Weaver, you pull your shot low left, high right, and low right?
The more data you can collect, the better. It will give you the advantage you need to hone in your training and focus on your problem areas. Use your MantisX systems to their full potential by creating your own mini-experiments like these and you will reach a new level of training!
The differences in the X10, X3, and X2 Shooting Smart Sensors
Your Training To-Do List
Now you need to go out and test your techniques! Try both live fire and dry fire testing for both shooting stances. If you want to compare with others, join the MantisX Enthusiast group on Facebook and compare tips and tricks with others! Or go into the Group section in the MantisX app and search for a group you want to join!


Rebecca Donnelly
Author